

Use Casii MCP in WorkBuddy
Open MCP server management under WorkBuddy's Connectors and paste one JSON config to connect Casii MCP.
Prerequisites
- WorkBuddy installed and signed in.
- An API key created in the dashboard — the MCP URL is already filled into the quick reference below.
Connection quick reference
The quick reference already contains your MCP URL; just replace YOUR_API_KEY with your key, then paste into WorkBuddy.
{
  "mcpServers": {
    "Casii MCP": {
      "type": "streamableHttp",
      "url": "https://api.casii.io/mcp/",
      "name": "Casii MCP",
      "headers": {
        "Authorization": "Bearer YOUR_API_KEY"
      }
    }
  }
}
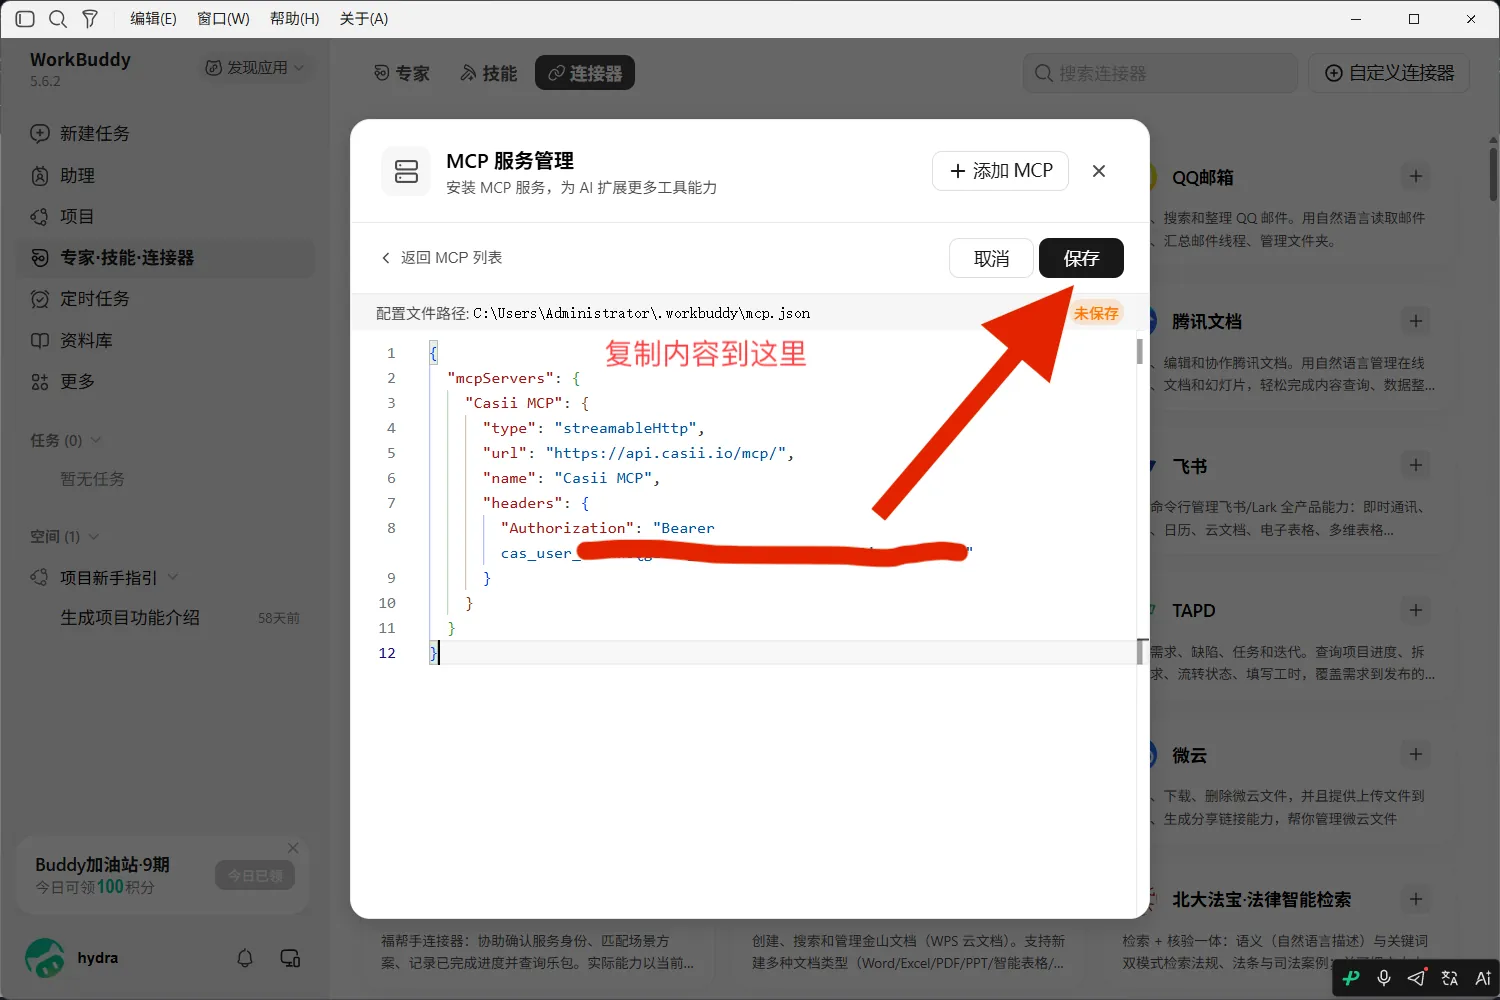
Keys in the screenshots are masked — use your own API key when you set things up.
Setup steps
-
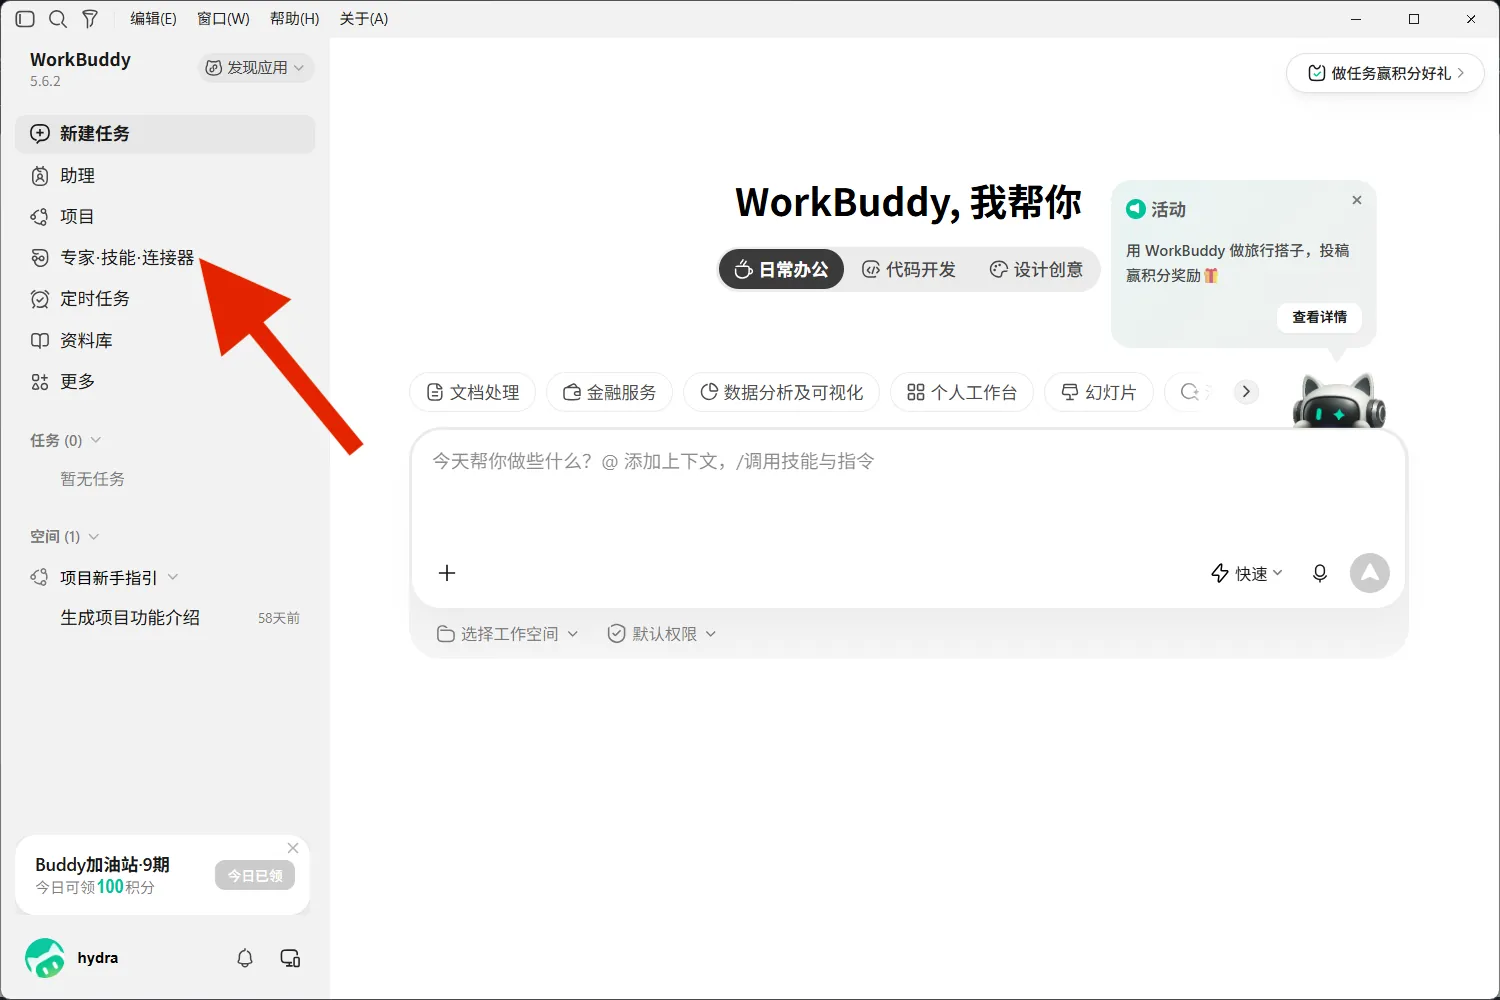
Open WorkBuddy and click "Experts · Skills · Connectors" in the left sidebar.
-
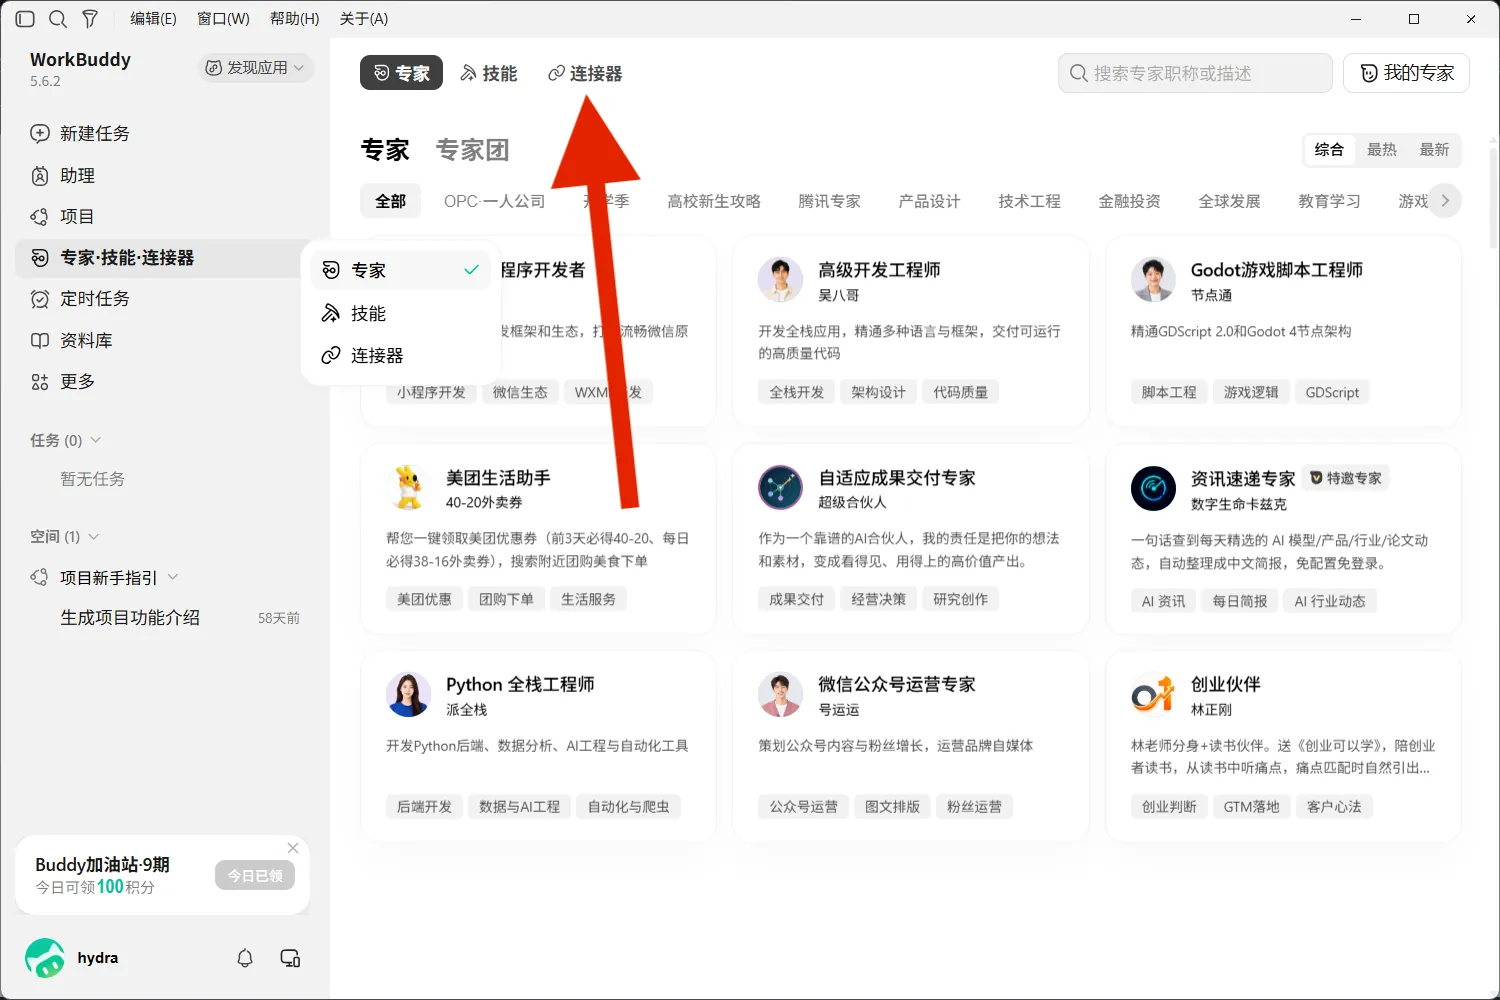
Click the "Connectors" tab at the top of the page.
-
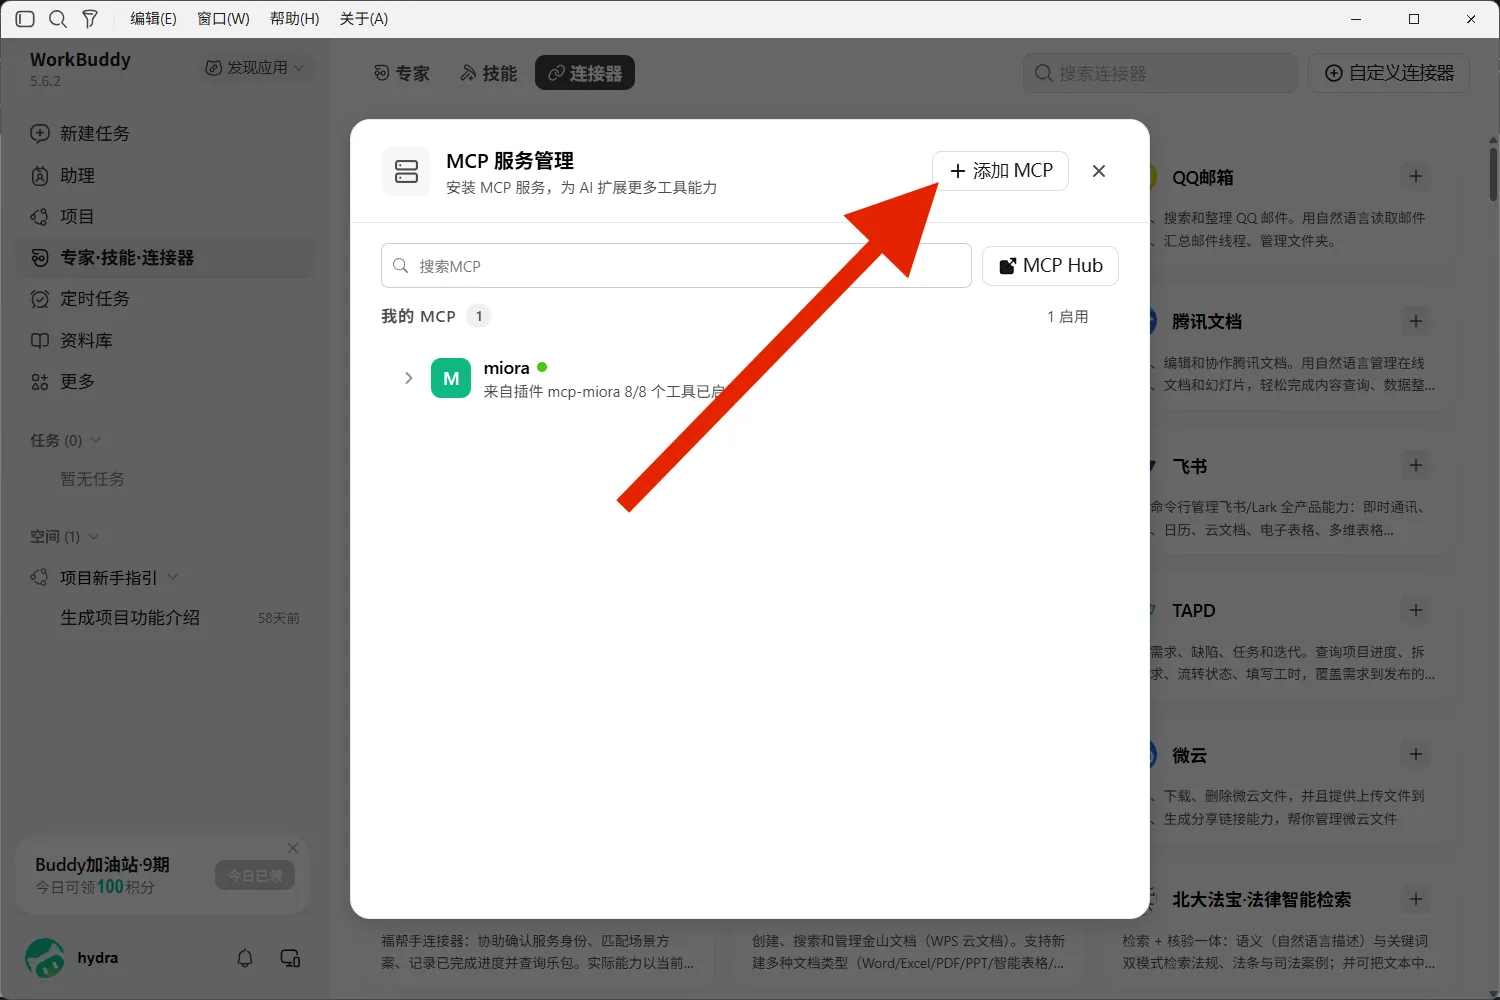
In the "MCP server management" dialog, click "+ Add MCP" in the top-right.
-
The editor opens the mcp.json config file. Click "Fill in my API key" in the quick reference below and copy the config, then replace everything in the editor with it (if you already use other MCPs, add only the "Casii MCP" entry inside mcpServers). Click "Save" in the top-right.
-
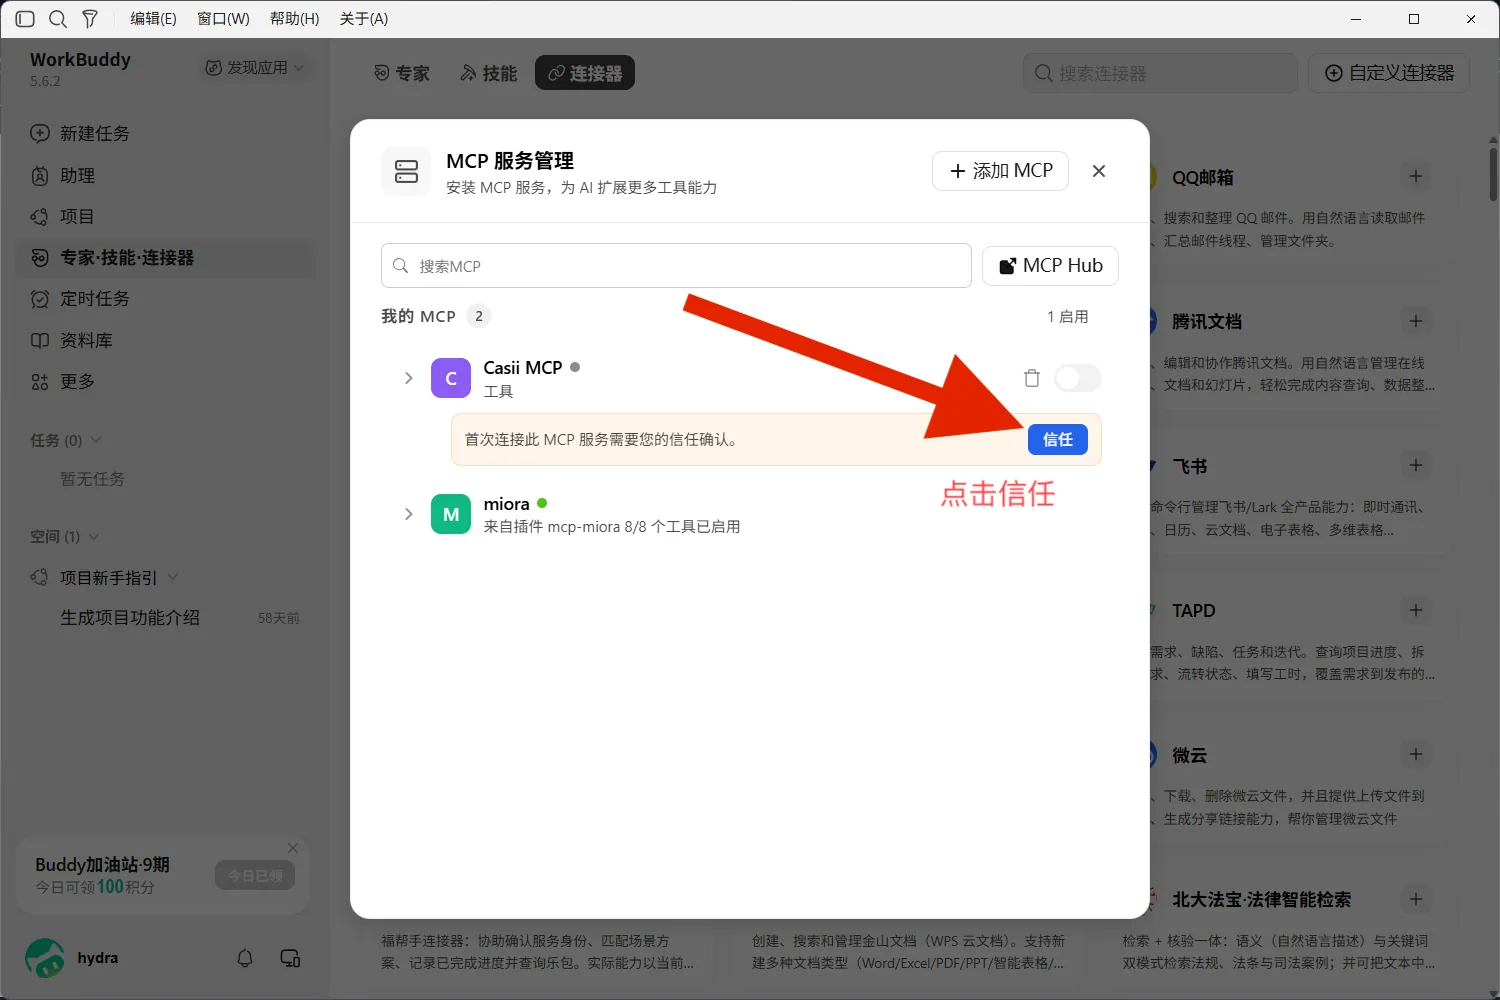
Back in the list, Casii MCP asks for trust confirmation on its first connection — click "Trust".
-
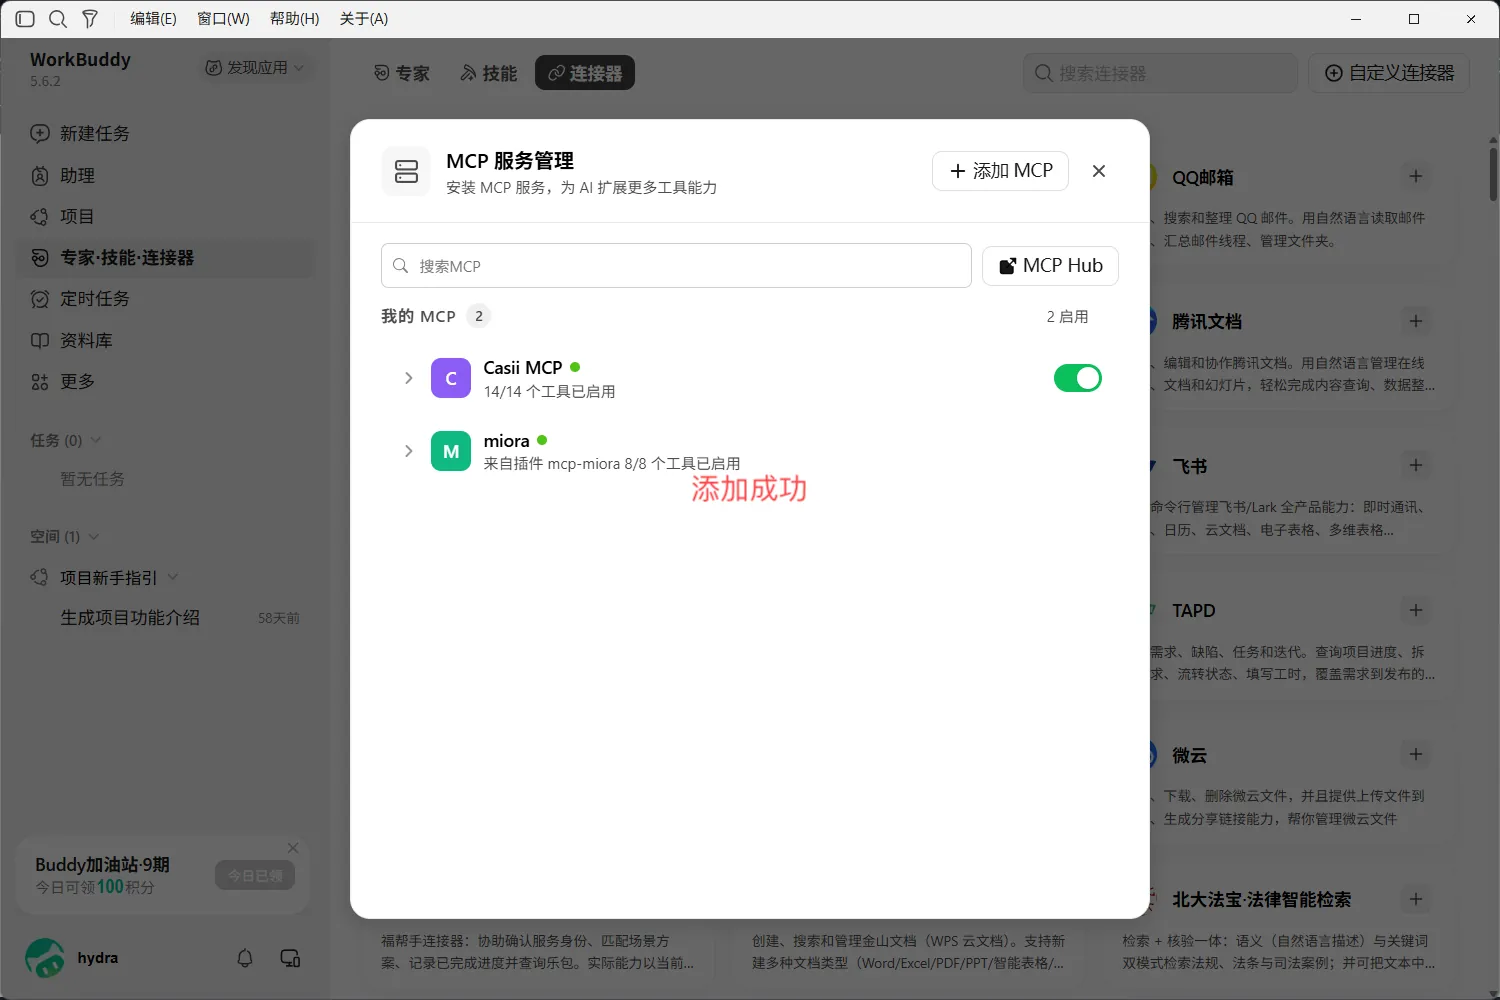
When Casii MCP shows a green dot, all its tools are enabled and its switch is on, it was added successfully.
-
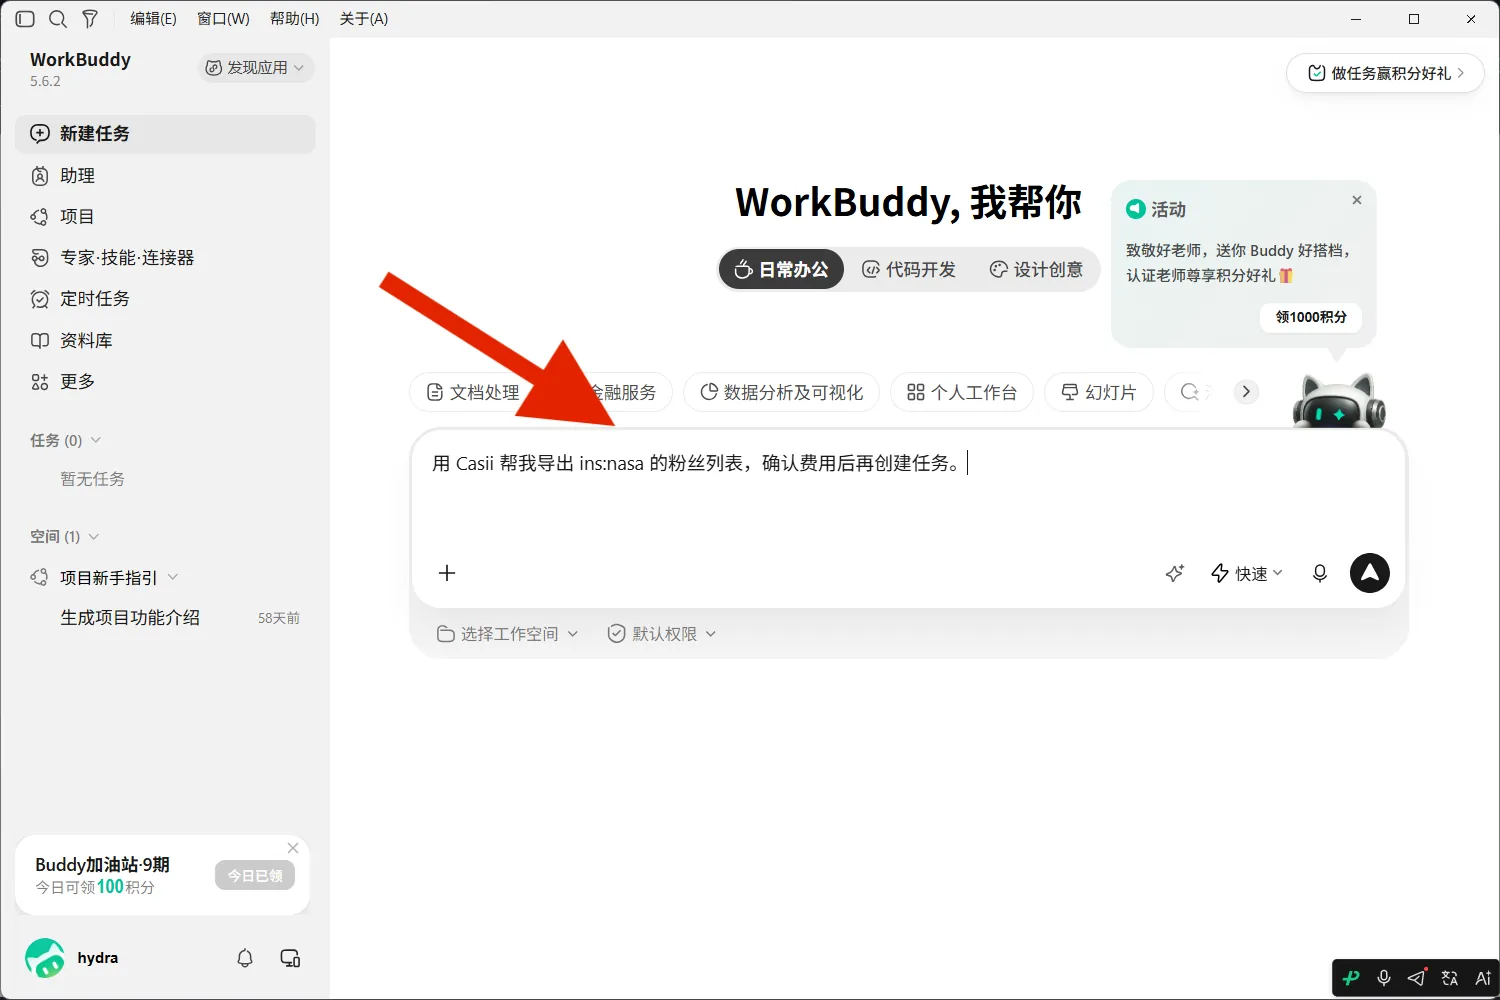
Close the dialog, click "New task" in the sidebar, then type your export request and send it.
-
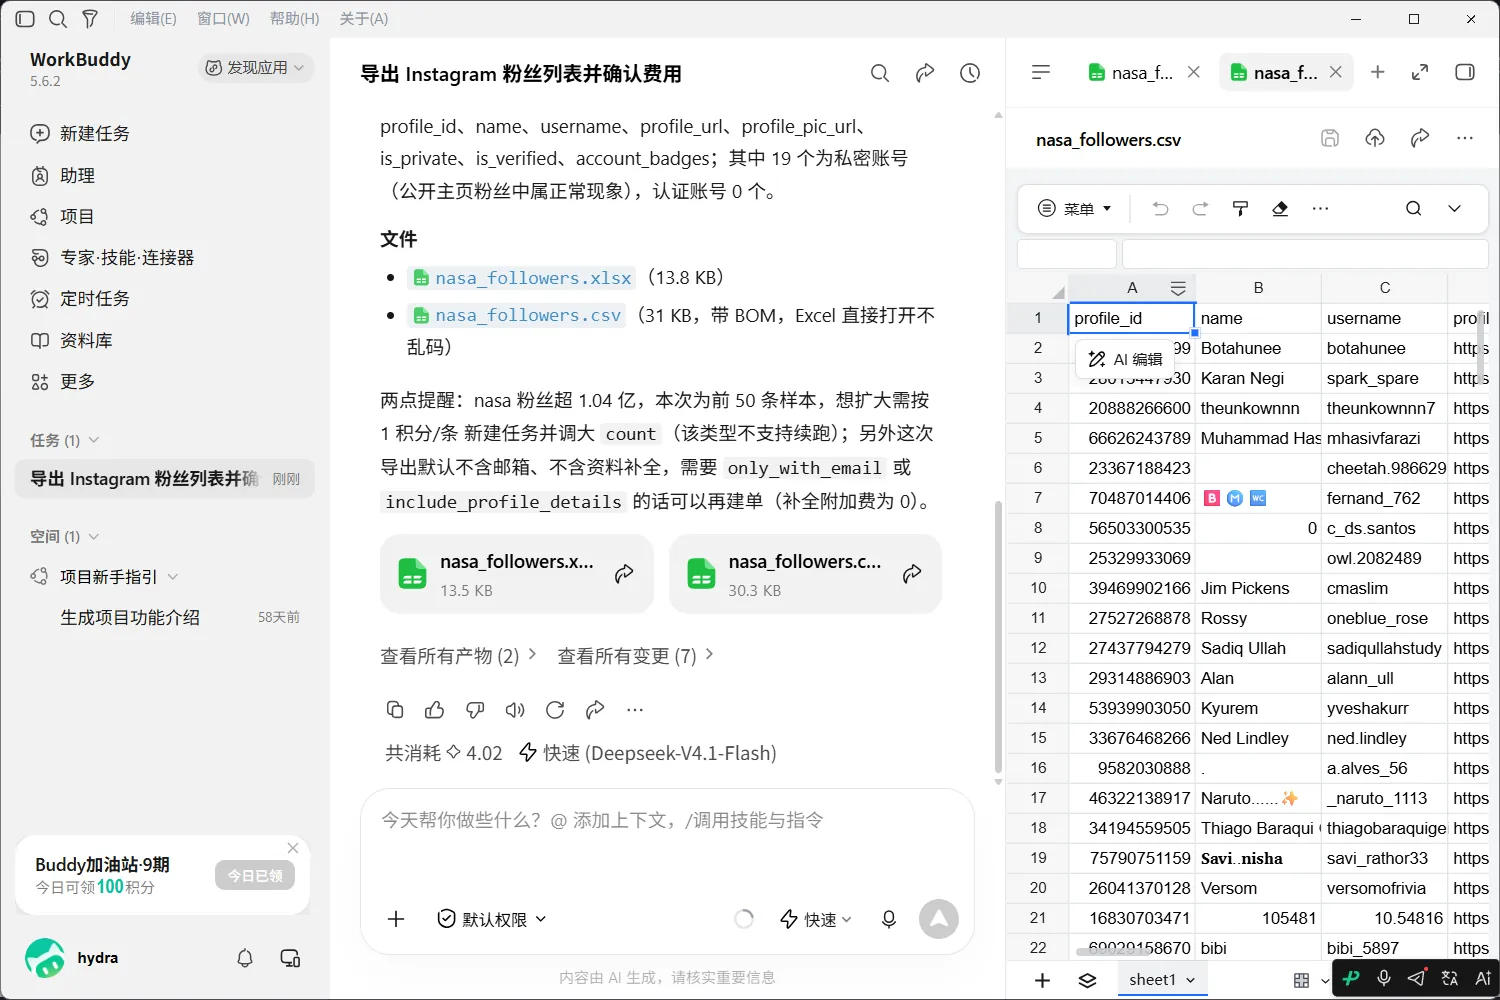
When the AI finishes calling Casii, CSV / XLSX files appear in the chat — click one to preview it on the right or download it.
If it fails to connect after saving, check that the JSON is complete (brackets, commas and quotes all in pairs) and that the Authorization value starts with "Bearer ".
Verify it works
Ask for an export directly in WorkBuddy, e.g.:
Use casii MCP to export 50 followers of Instagram user @nasa for me; no extra data needed.
The first call asks for tool permission; after that the AI handles detection, quoting and creation automatically. Creating and resuming must carry a stable idempotency key (idempotency_key, UUID format) generated once: retrying with the same key and the same parameters returns the original tasks and never charges twice; only changed parameters make it a new operation with a new key.
No API key yet?
Create one on the dashboard API Keys page, then follow the steps above to connect.