

Use Casii MCP in MiniMax Code
Add Casii MCP as a server in MiniMax Code desktop's plugin manager — its form accepts the Authorization header directly.
Prerequisites
- MiniMax Code installed and signed in.
- An API key created in the dashboard — the MCP URL is already filled into the quick reference below.
Connection quick reference
The quick reference already contains your MCP URL; just replace YOUR_API_KEY with your key, then paste into MiniMax Code.
Name: casii-mcp
Type: Streamable HTTP
URL: https://api.casii.io/mcp/
Header: Authorization = Bearer YOUR_API_KEY
Keys in the screenshots are masked — use your own API key when you set things up.
Setup steps
-
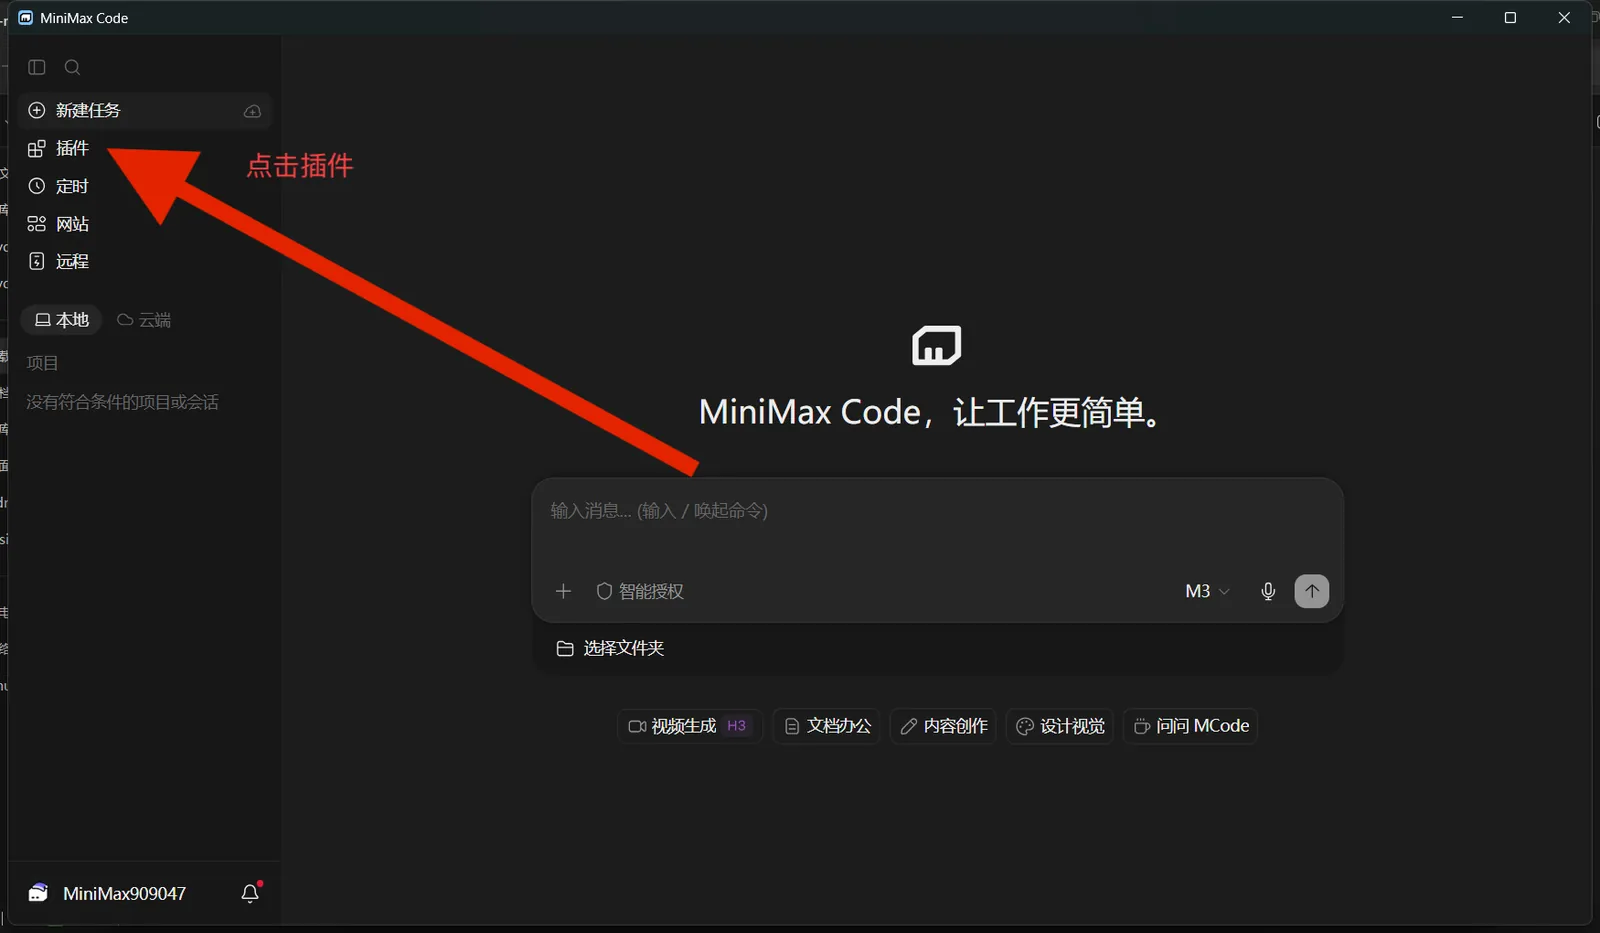
Open MiniMax Code and click "Plugins" in the left sidebar.
-
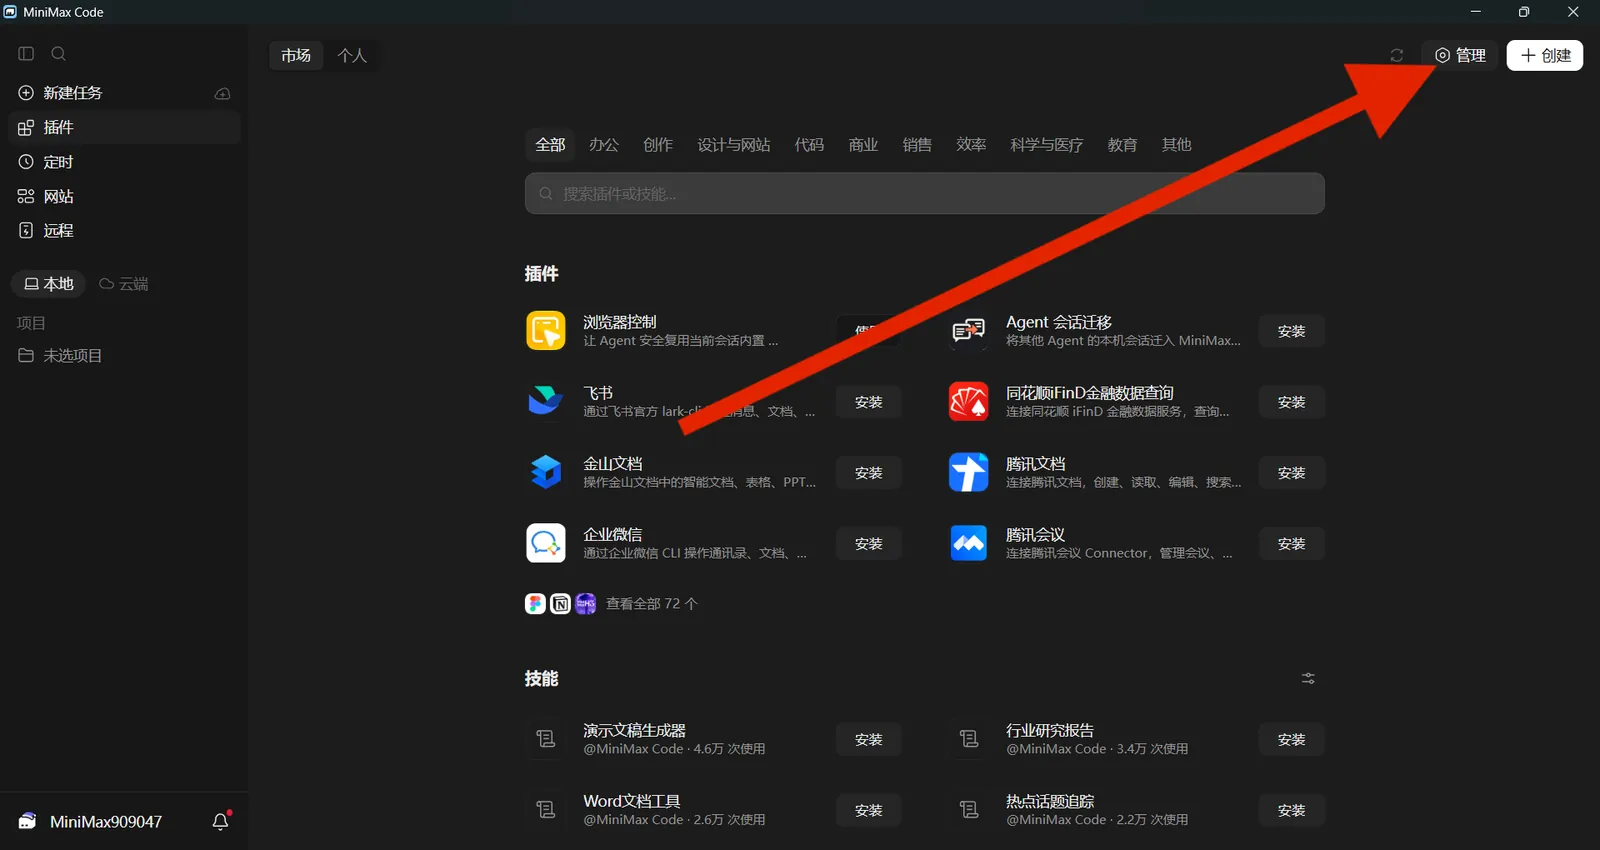
On the Plugins page, click "Manage" in the top-right corner.
-
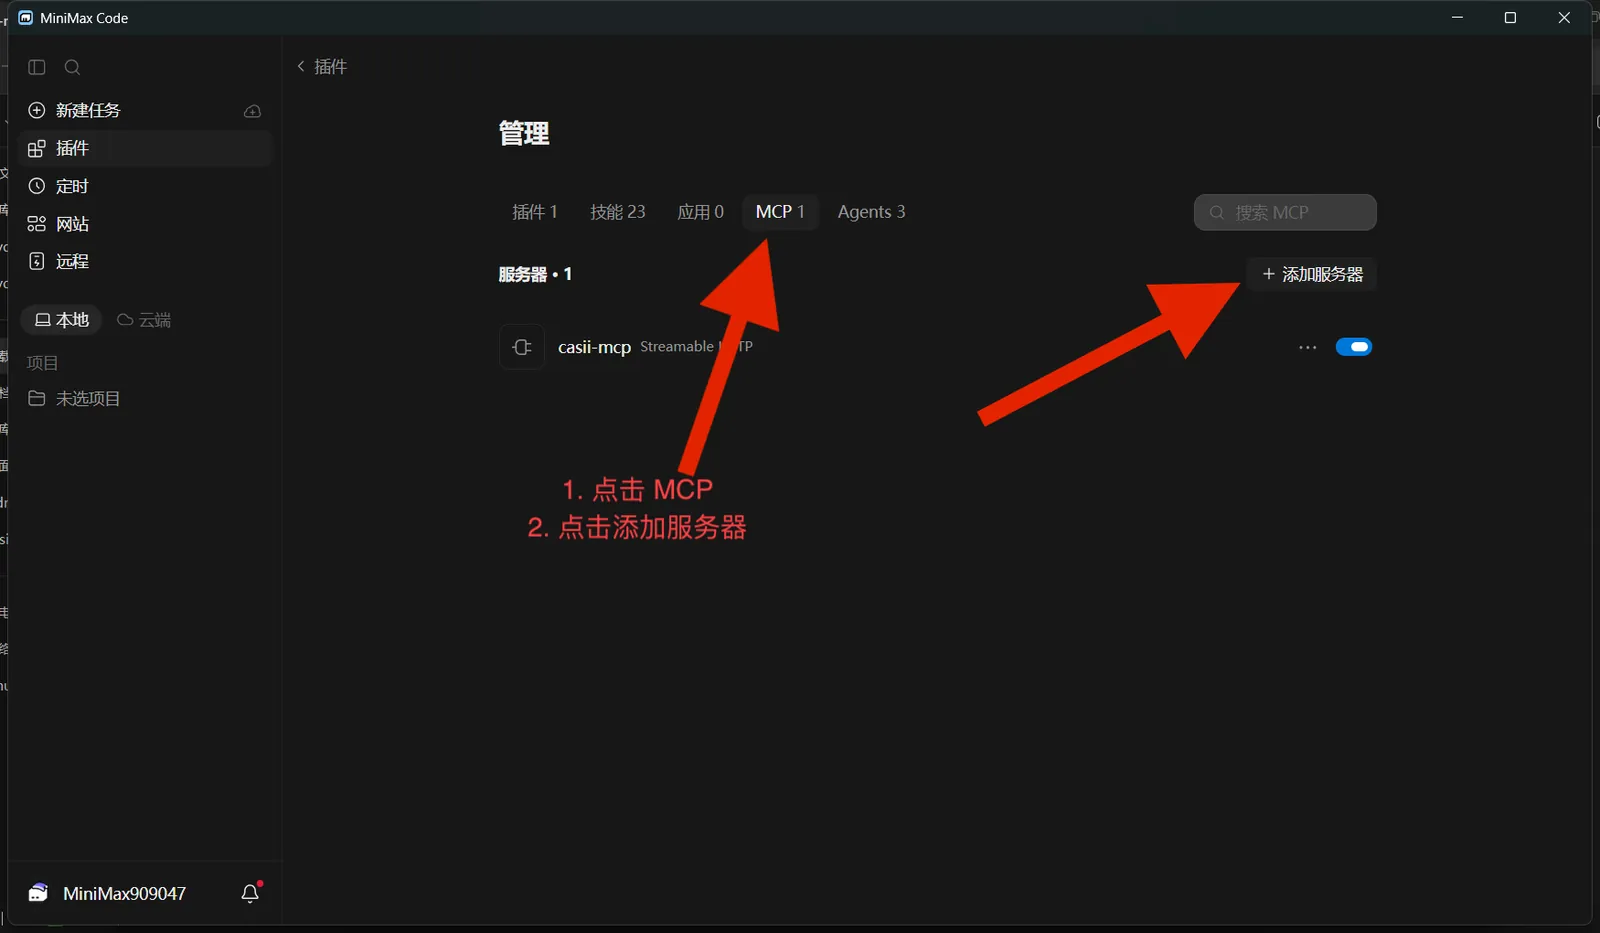
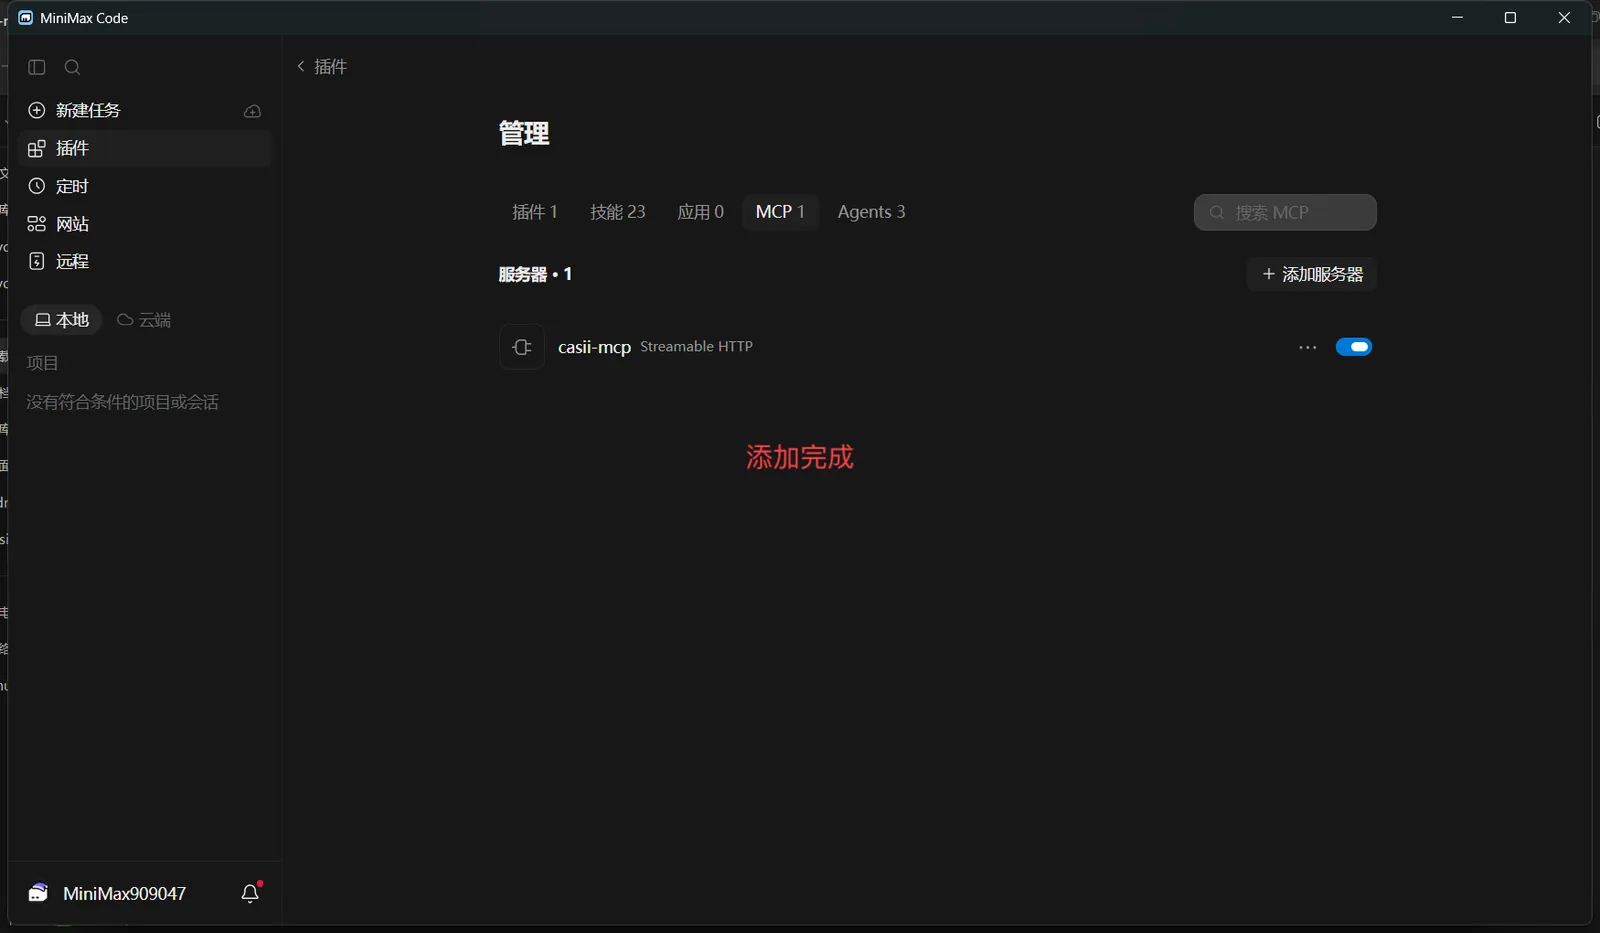
Switch to the "MCP" tab, then click "+ Add server" on the right.
-
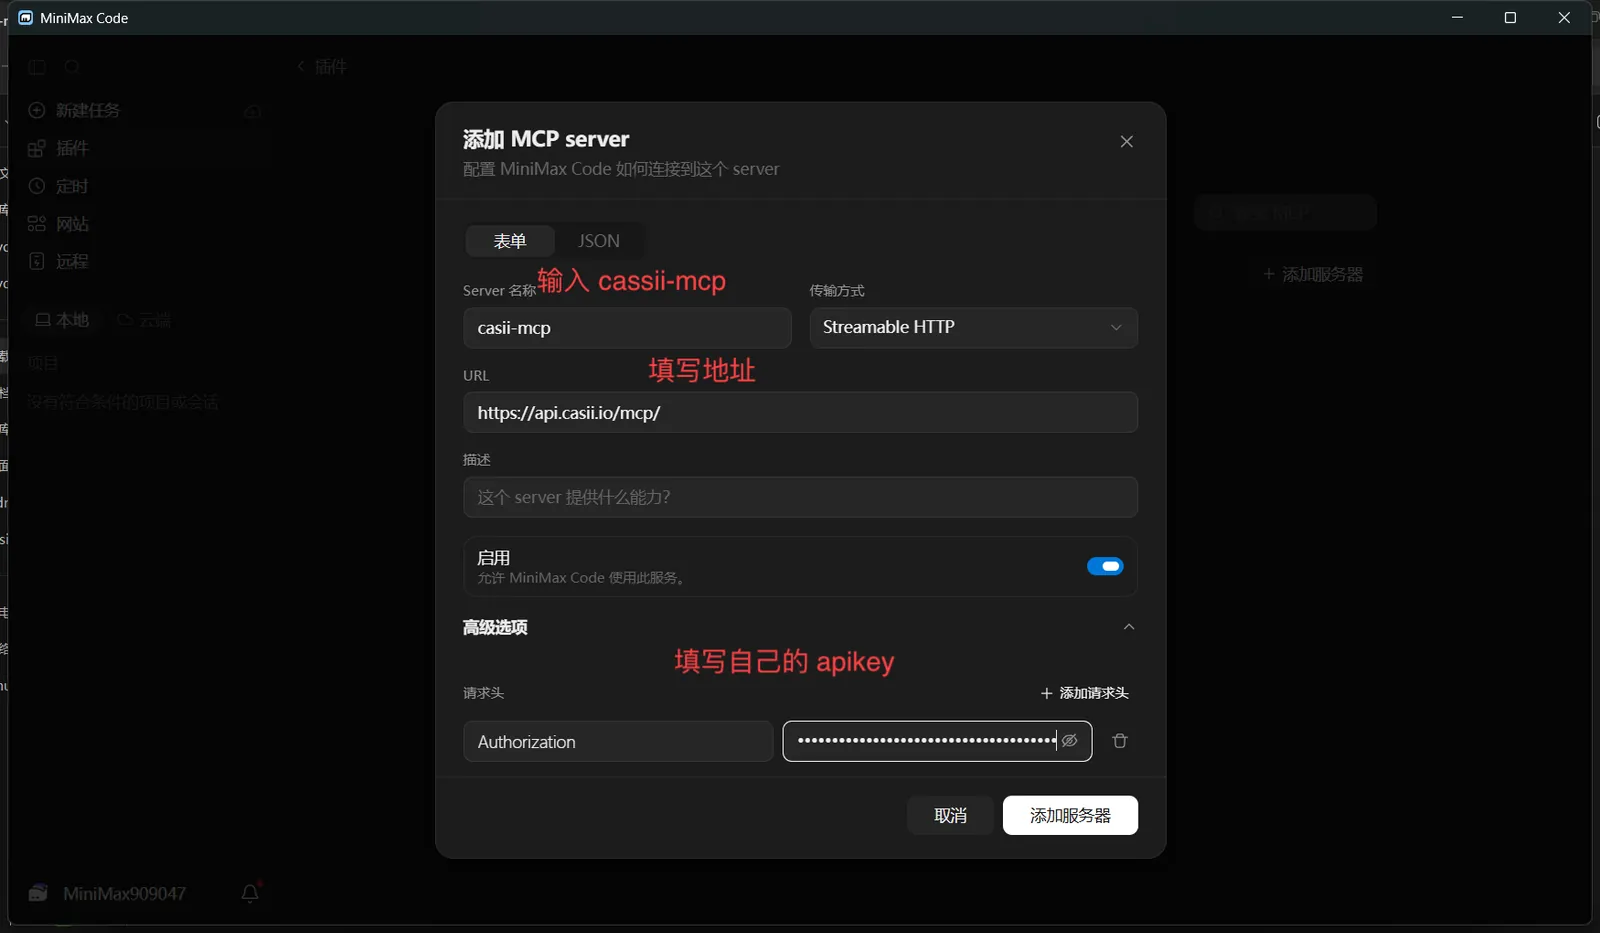
In the "Add MCP server" dialog (Form tab), set Server name to casii-mcp, Transport to "Streamable HTTP" and URL to your MCP URL. Expand "Advanced options", click "+ Add header", then enter Authorization on the left and Bearer YOUR_API_KEY on the right (one space after Bearer). Keep "Enable" on and click "Add server".
-
casii-mcp now appears in the list with its switch on — setup is complete.
-
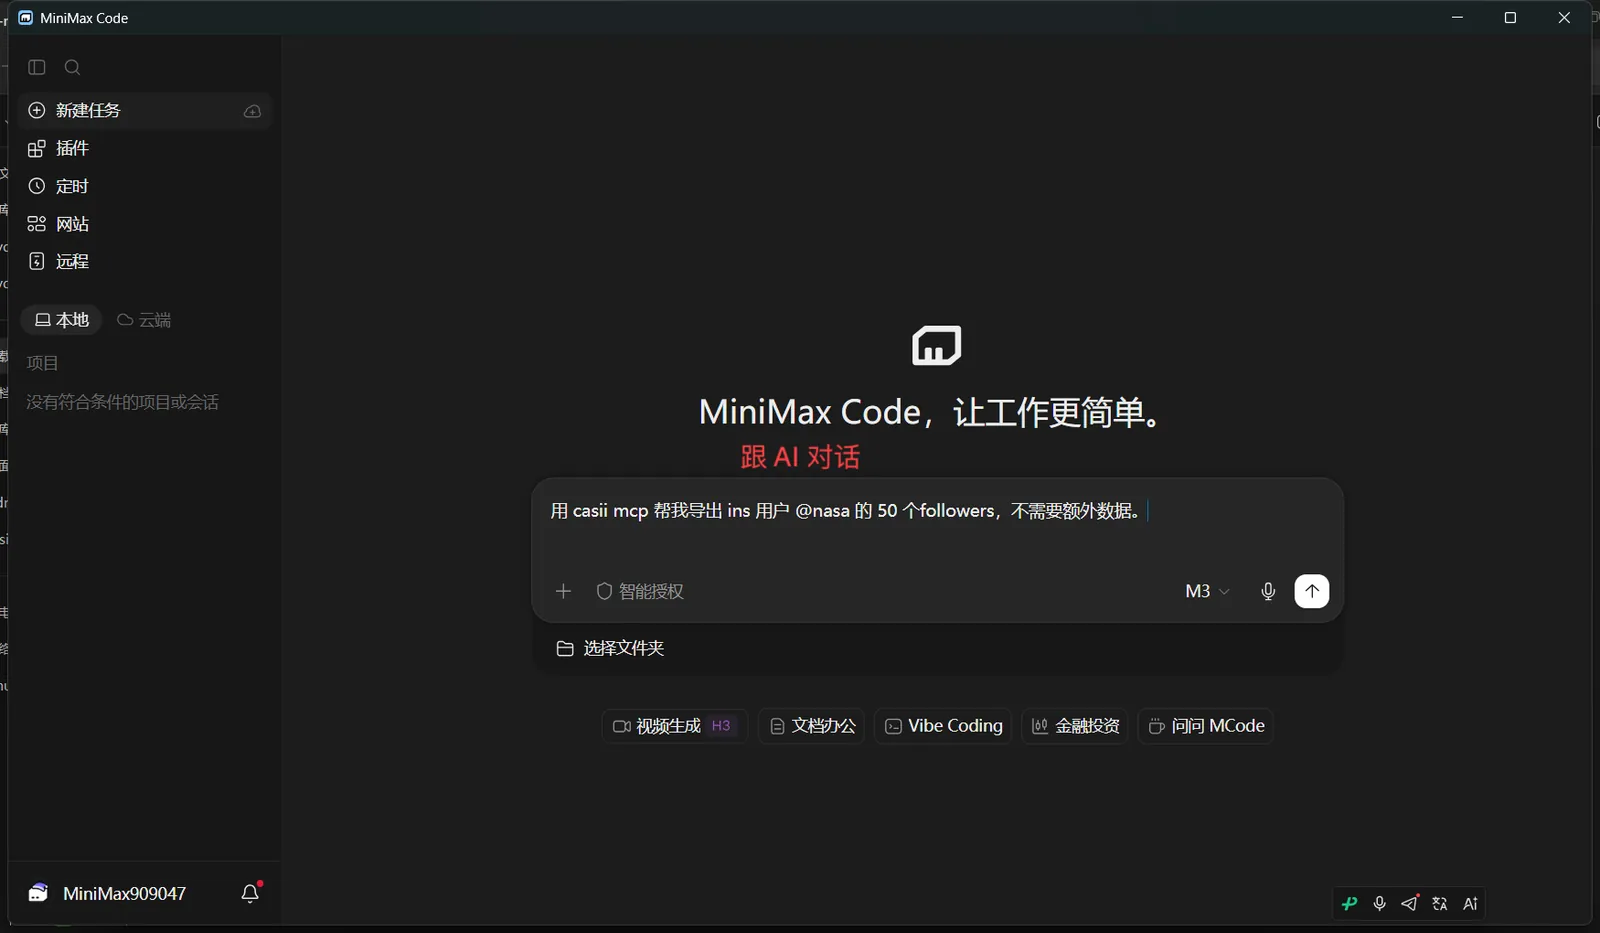
Click "New task" in the sidebar, type your export request in plain language (you can copy the example below) and send it.
-
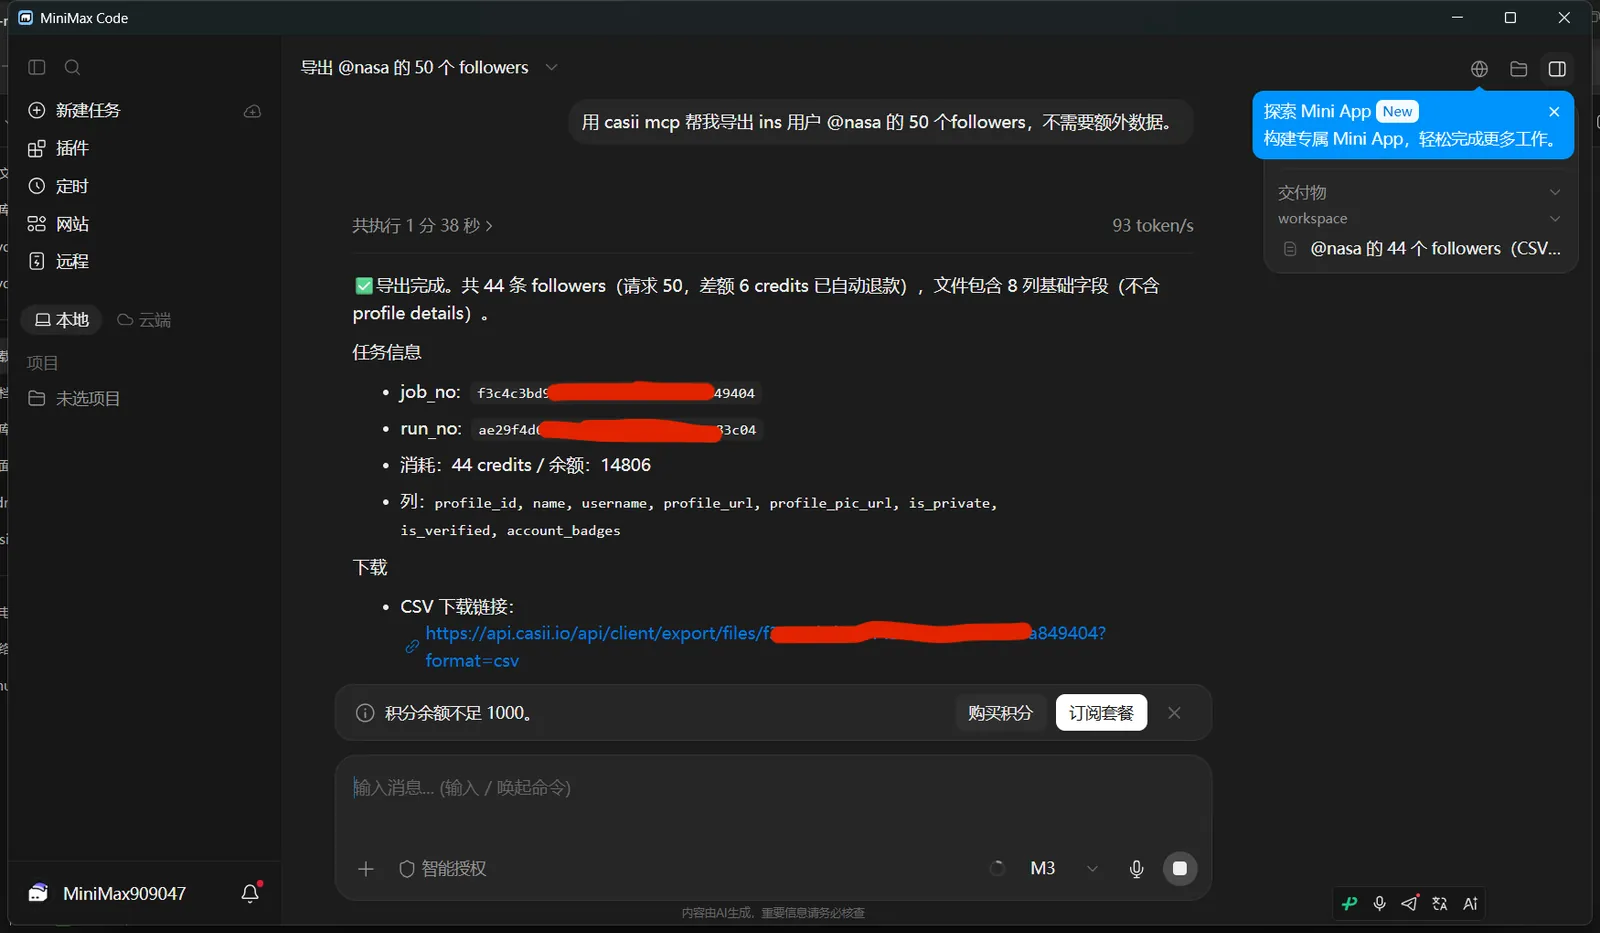
The AI calls Casii automatically. The reply shows the row count, credits used and a CSV download link, and the file is also available under "Deliverables" on the right.
The header value must start with "Bearer " (note the space). Entering only the key is rejected with 401.
Verify it works
Ask for an export directly in MiniMax Code, e.g.:
Use casii MCP to export 50 followers of Instagram user @nasa for me; no extra data needed.
The first call asks for tool permission; after that the AI handles detection, quoting and creation automatically. Creating and resuming must carry a stable idempotency key (idempotency_key, UUID format) generated once: retrying with the same key and the same parameters returns the original tasks and never charges twice; only changed parameters make it a new operation with a new key.
No API key yet?
Create one on the dashboard API Keys page, then follow the steps above to connect.